While most smartphones take great photos, they’re often not high quality enough for publishing anywhere other than social media. So for all you amateur photographers out there looking to sharpen your skills, below are some tips and trends to make you look like a pro.
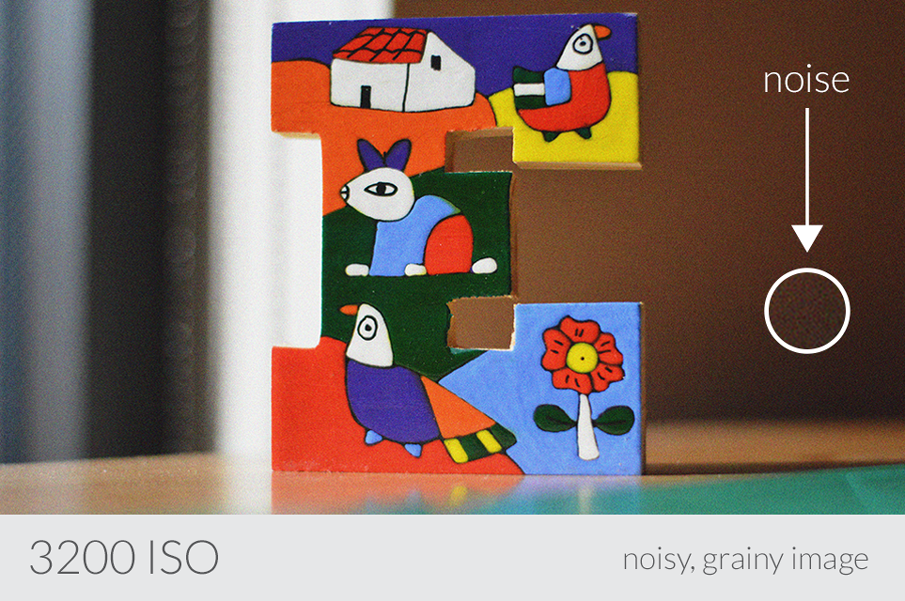
ISO – measures the image sensor’s sensitivity to light
- Standard range is 100-3200.
- The more light you have, the lower the ISO should be. For example, a bright sunny day would require an ISO of 100.
- Always try to stay at 400 or lower. The lower, the better.
- A high ISO will create noise…noise = grainy.

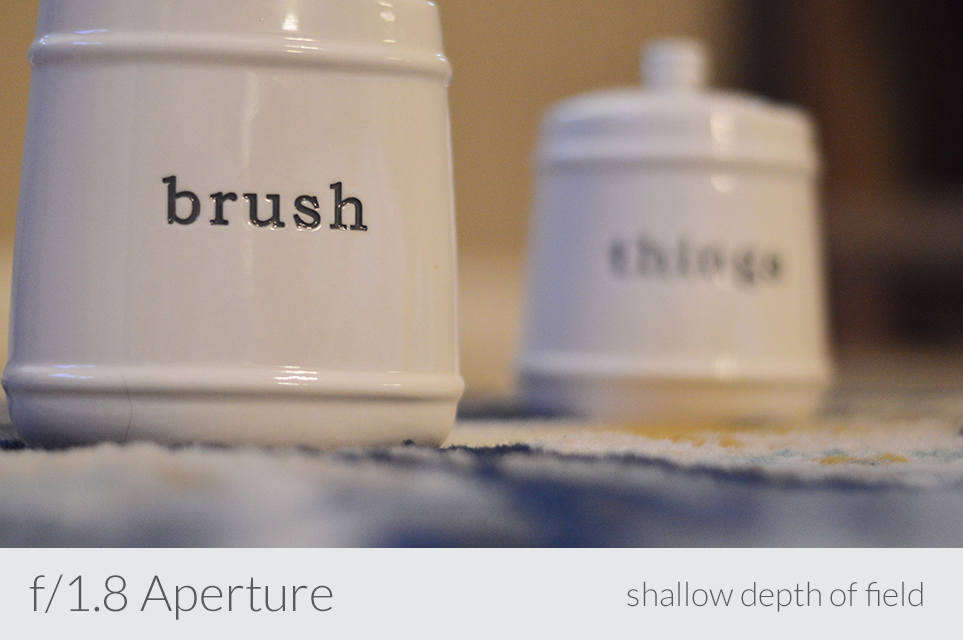
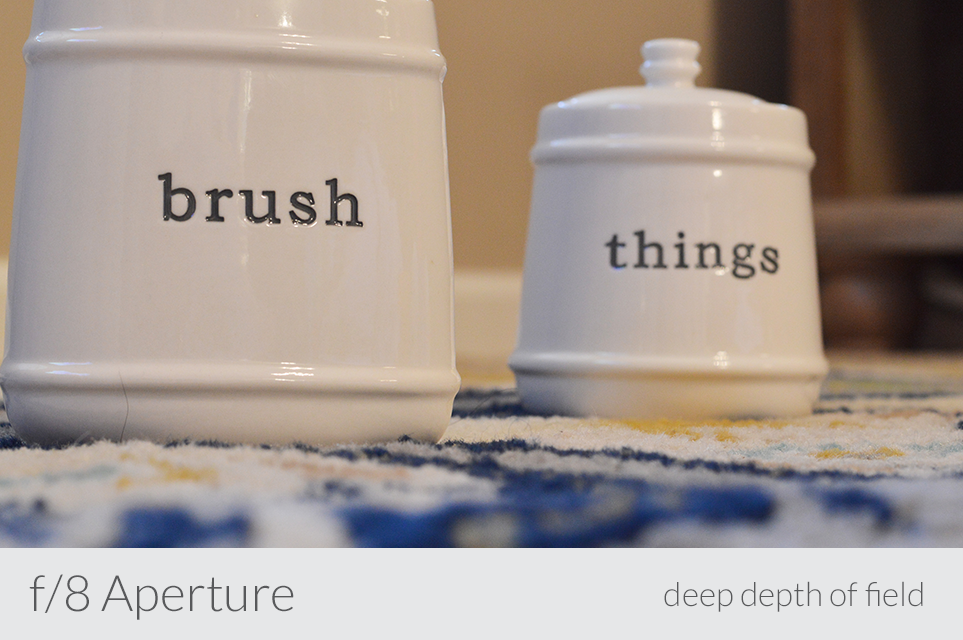
Aperture – opening in lens that controls how much light is let in
- Measured in f-stops.
- Aperture controls depth of field.
- Standard range is f/1.2-f/32.
- The lower the f/stop, the shallower the depth of field, so it creates a blurry background.
- Low f/stops are great for portraits.
- The higher the f/stop, the deeper the depth of field, so it creates a detailed background.
- High f/stops are great for landscape shots.
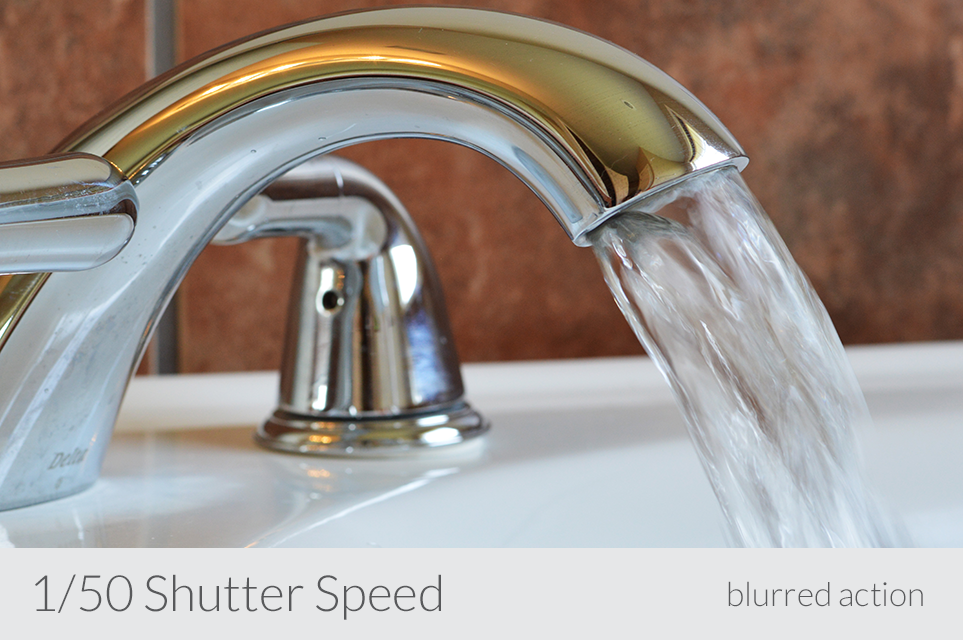
Shutter Speed – determines how long light will be exposed to sensor
- Standard range is 1/4000-30 seconds.
- Slow shutter speeds blur movement (1/15-30).
- A tripod is needed for slower shutter speeds.
- Fast shutter speeds freeze movement (1/200 and up).
- Fast to slow: 1/4000, 1/2000, 1/1000, 1/500, etc.
- The lower the number, the faster the shutter speed.

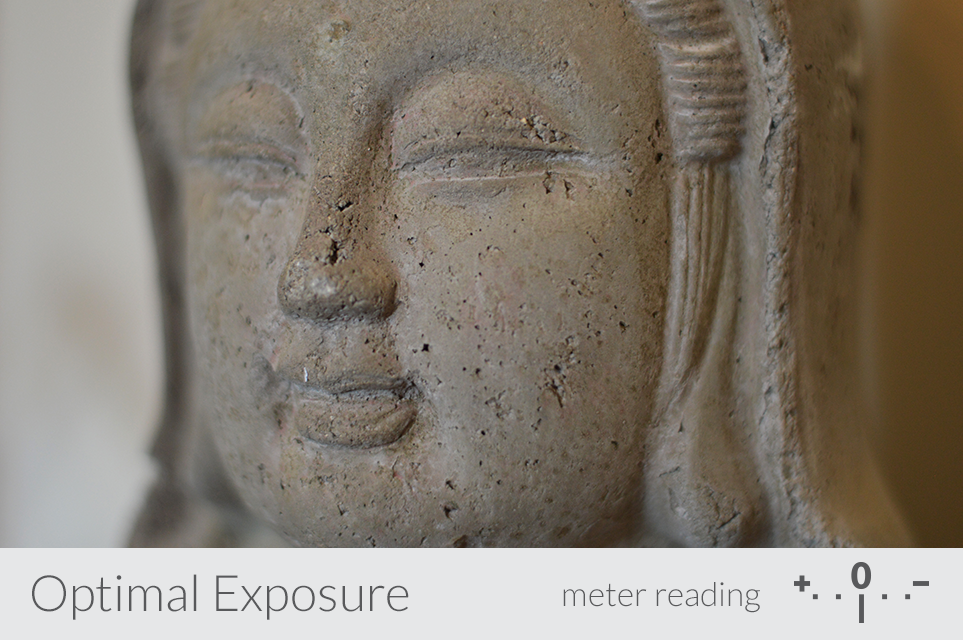
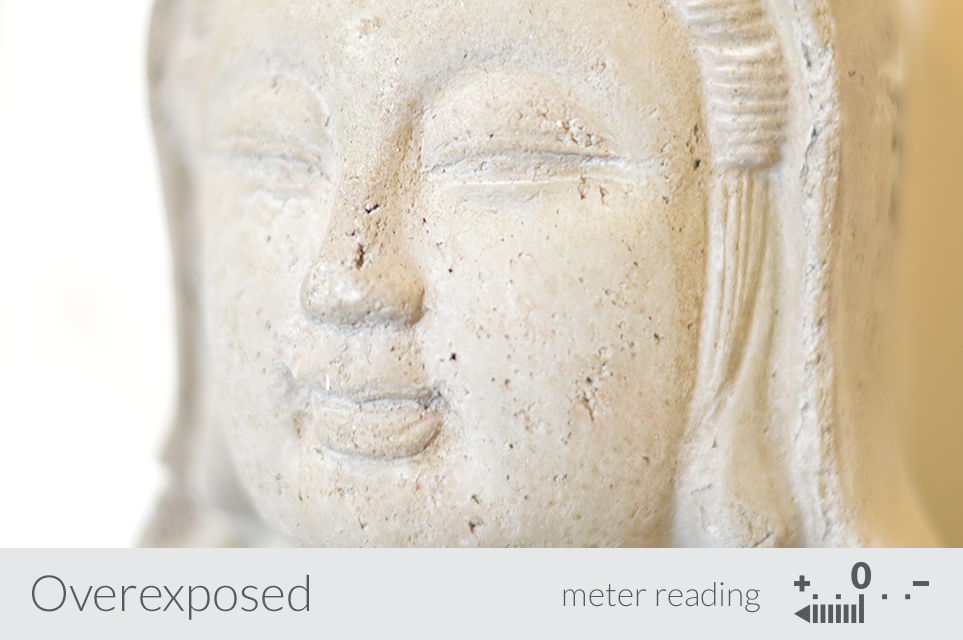
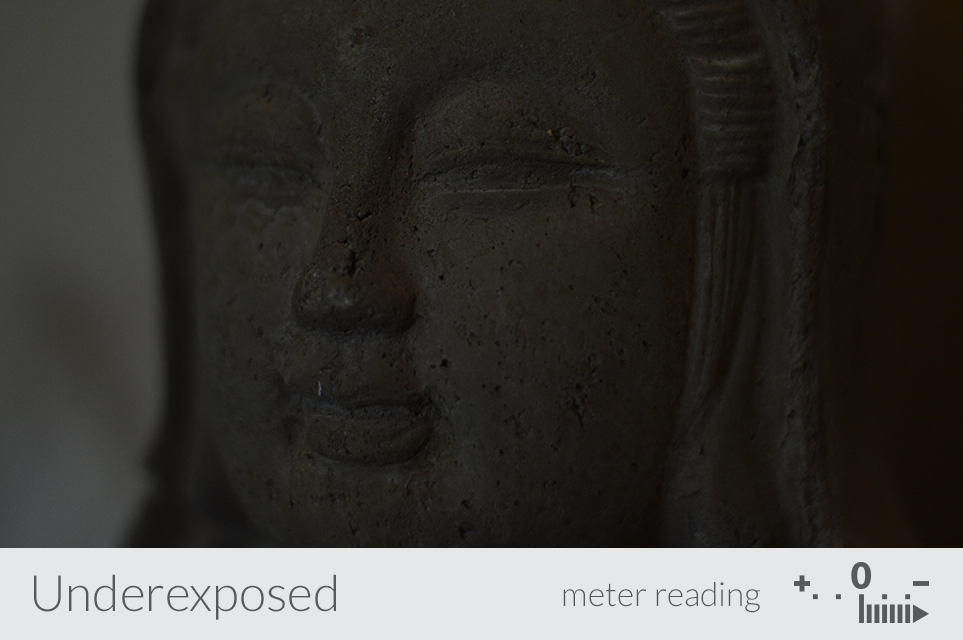
Metering & Exposure – used to measure the brightness of a subject
- For optimal exposure, keep meter in viewfinder at 0. (See meter in viewfinder by pushing shutter release button halfway down; toggle meter using dial wheel.)
- Increased exposure brightens image; decreased darkens image.
- Types of Metering: Matrix, Center-weighted, Spot
- Matrix – reads light from entire scene
- Center-weighted – reads lights from the center
- Spot – reads light from one spot